This blog focuses on the main aspects of how to get credentials to deal with different APIs like Sheets, Calendar, etc. The process remains almost the same. The only changes are in choosing the platform and the required scopes. So feel free to do appropriate modifications as per your application requirements. Follow the steps to stay in the loop and get the result as expected.
Steps to get credentials from GCP
Head to http://console.cloud.google.com and click on the drop-down and select `New Project`.


Give a unique name to create a new free cloud project
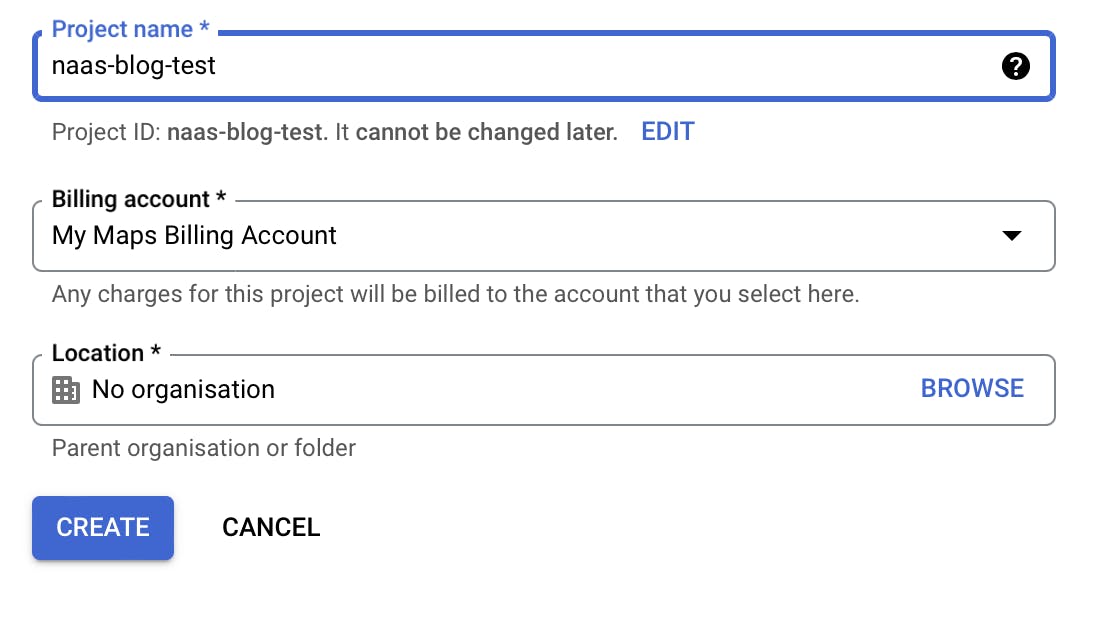
It takes some time to allocate the resources for the project. So make sure to wait for some time until the project is established successfully.
On the left panel click on
API & Servicestab and enable Google Calendar API.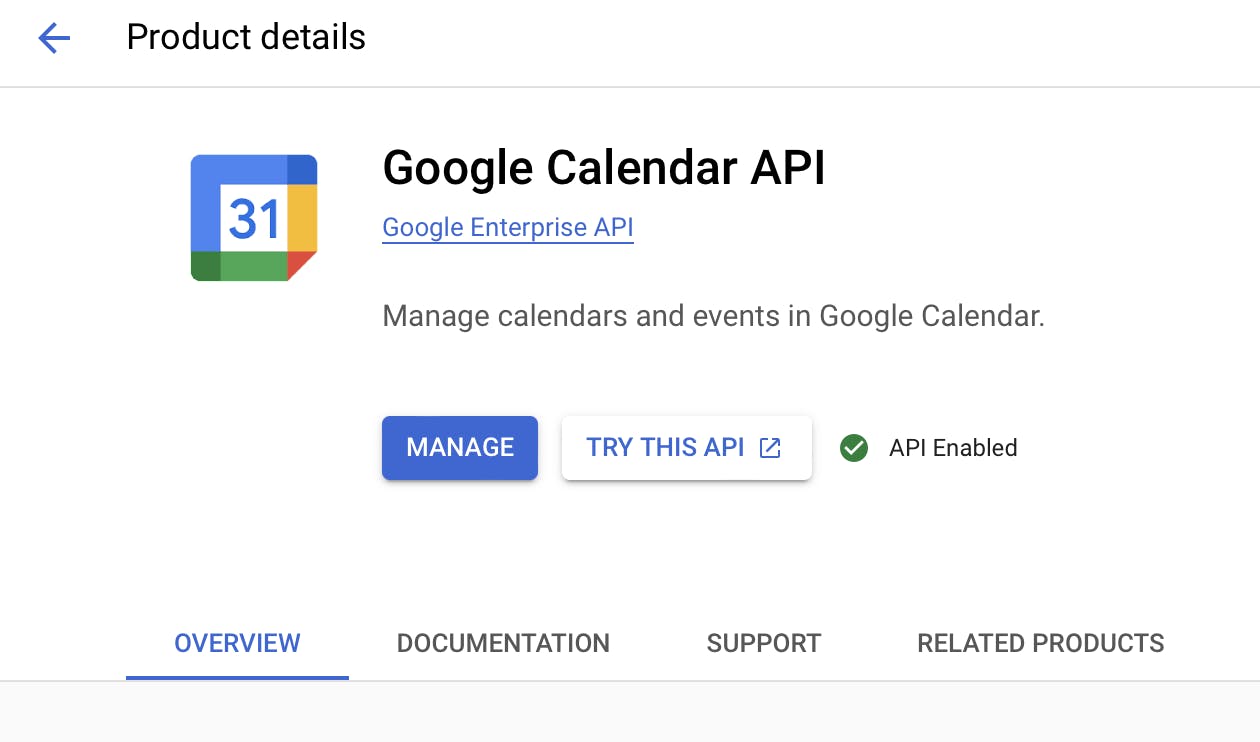
Make sure that it has
API Enabledand has a green tick.Click on
Manage, then navigate toCredentialson the left pane and create a selectCreate Credentials -> OAuth Client ID. Follow Step-4 in this guide for further reference. If you are prompted toConfigure the consent screenthen follow these steps:Choose the
User typeasExternal: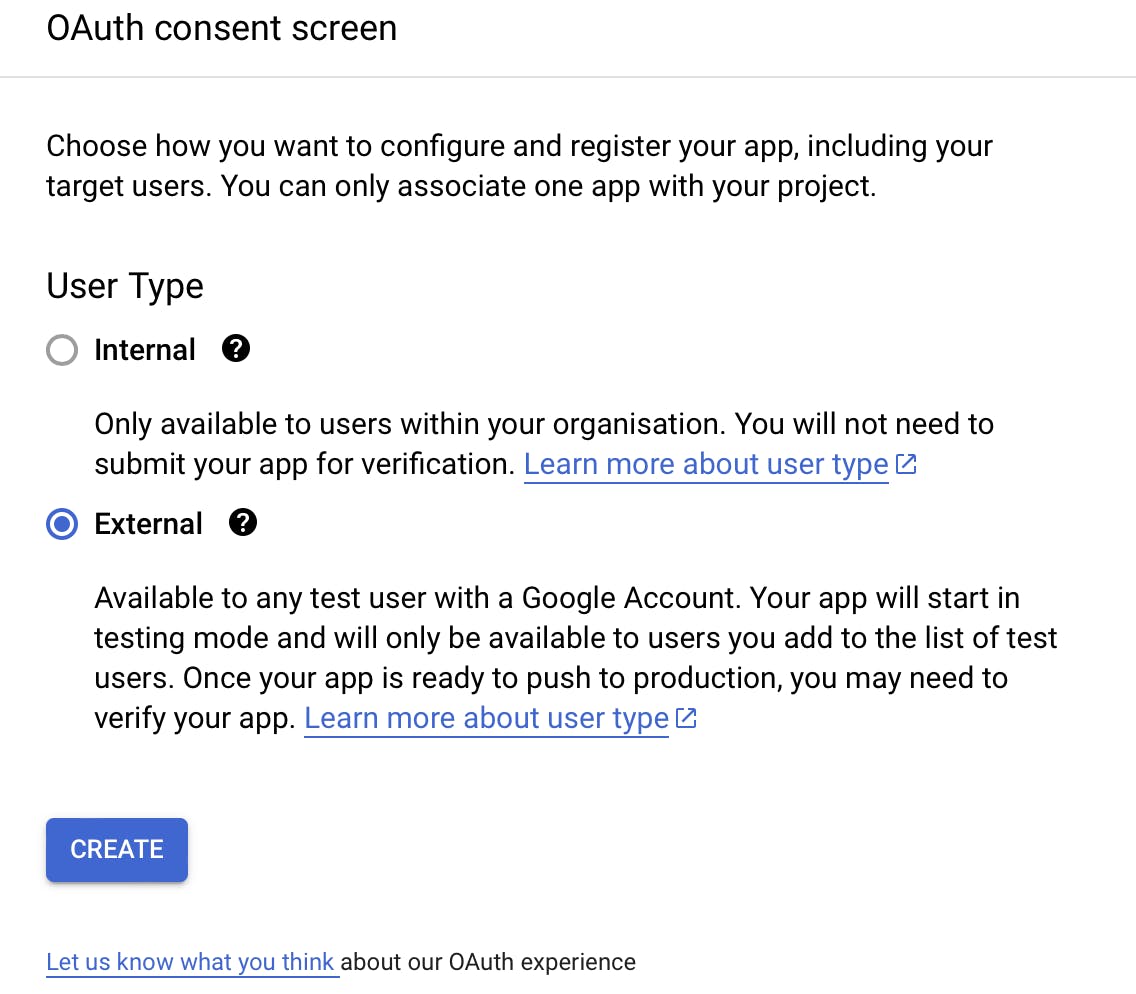
Then fill in the mandatory fields like
App name,User support email, andEmail addressesare at the bottom.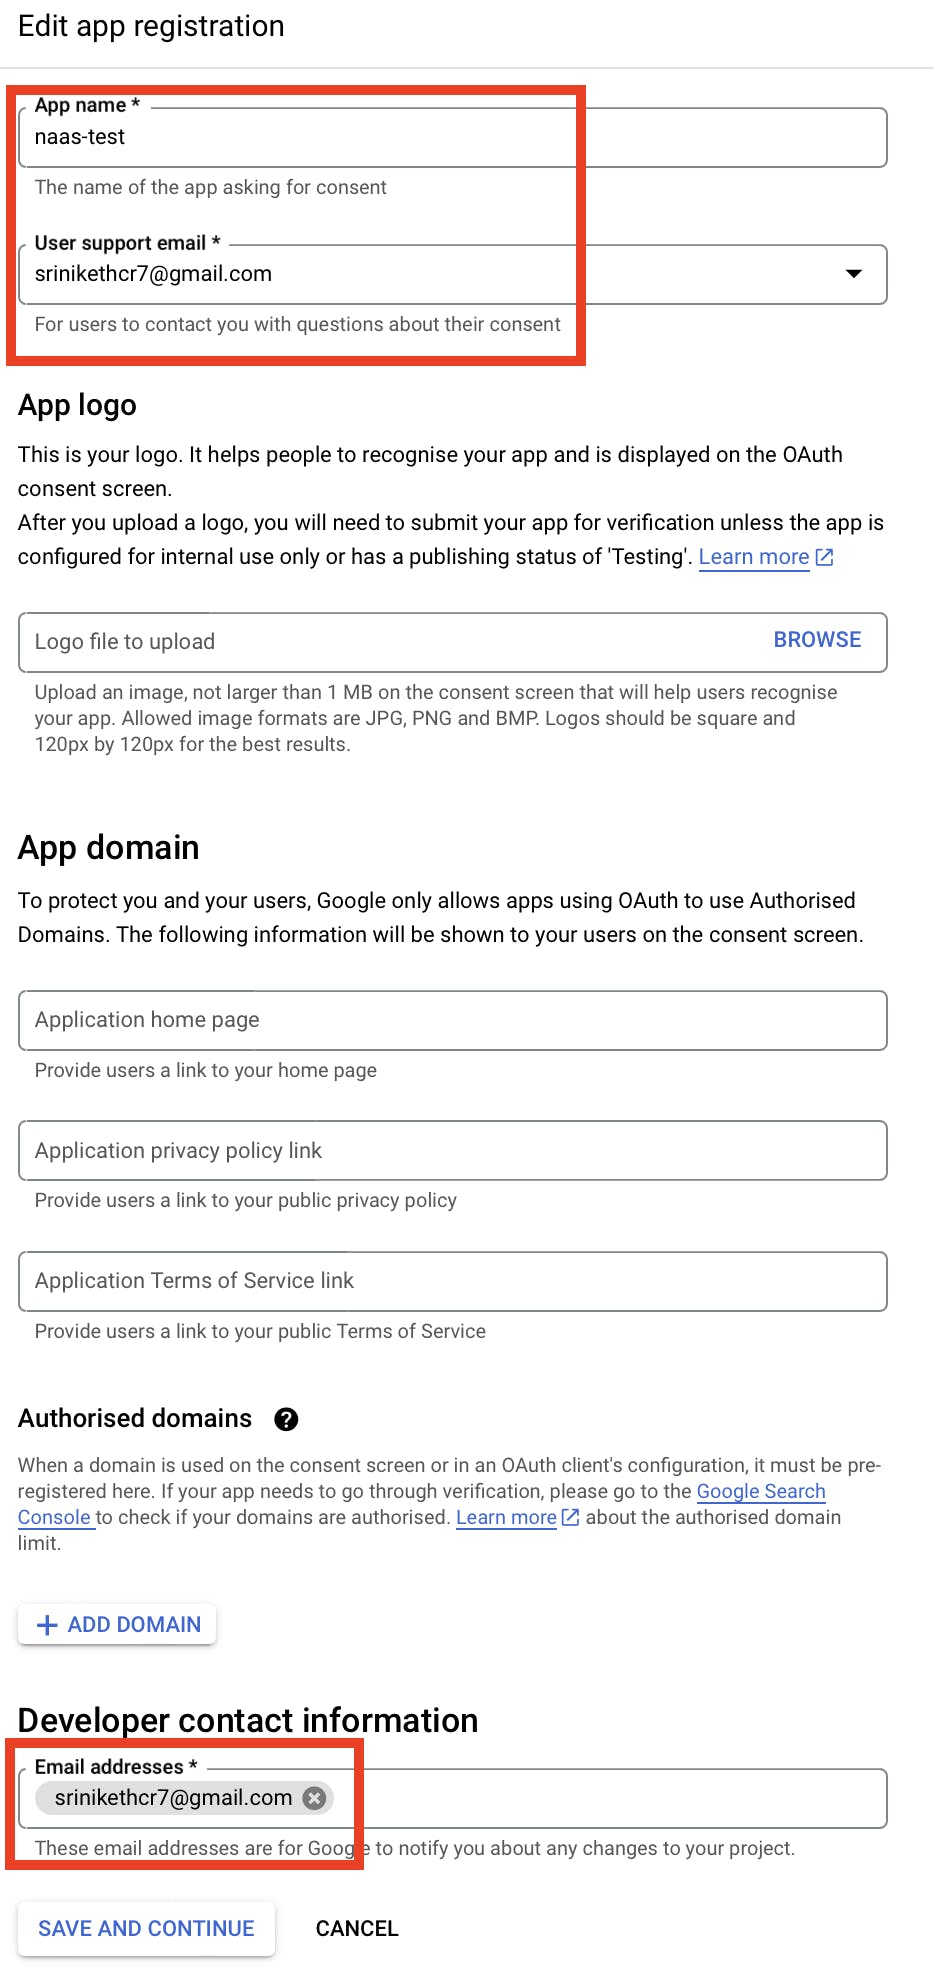
Then click on
SAVE AND CONTINUEand move to the next step.Then click on
Add or remove scopesand select the correct scope for this we shall require Google Calendar/auth/calendarscope. If they are different feel free to choose the one's according to your project. Also, they can be modified even after they are created.
Then select
Updatebutton.Then click on
Save and continueuntil you reachBack to dashboard. Then proceed with steps ahead.
Click
Application type -> Desktop app. In the name field, make sure to give it a unique name.Click
Create. The OAuth client-created screen appears, showing your newClient IDandClient secret.Save the downloaded JSON file as
secrets.json. It should like something similar (not the same actually)👇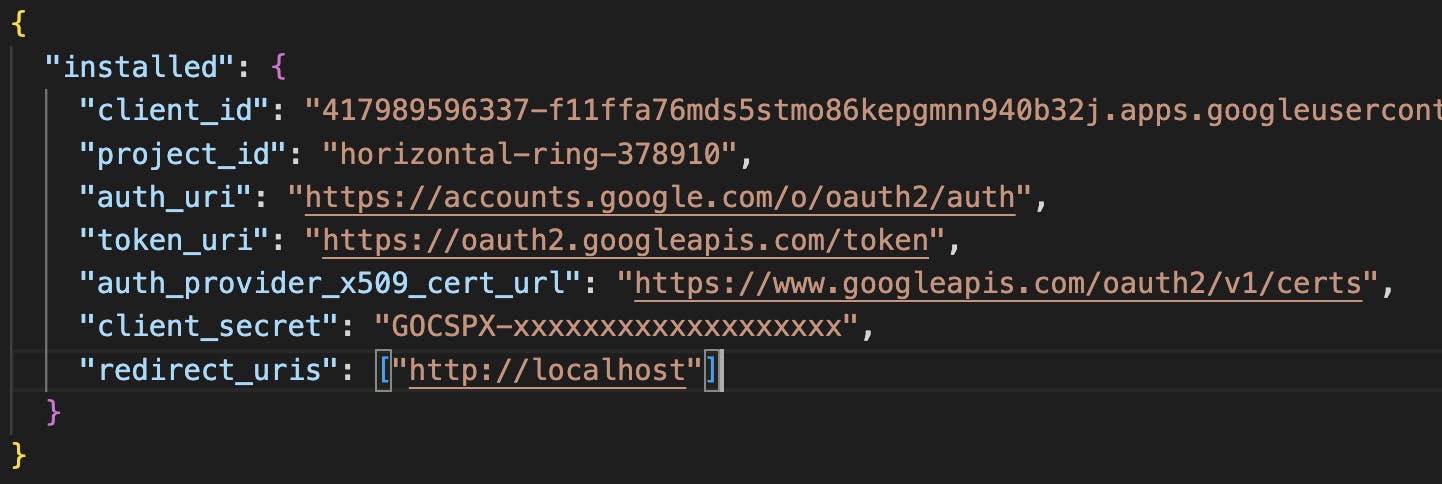
Then download the
.jsonfile generated and use them in your application wherever required.
Thanks for staying till the end. Hope you like the blog. Up for comments and suggestions. Feel free to click on ❤️ if you liked reading the blog.

